

You create new Designs by using the toolbar buttons on the Designbox Window. You start by selecting the Design Palette that will contain the new Design. You then click the New Form Design or the New Control Design button. The New Form Design button creates a new Design that automatically targets the Form type and the New Control Design button will create a new Design that lets you specify the target type by picking a control type from the Visual Studio Toolbox.
| New Form Design Button | Creates a new Design (in the selected palette) that targets System.Windows.Forms.Form and opens the Design for editing in a Design Editor | |
| New Control Design Button | Creates a new Design (in the selected palette) that allows you to drag and drop a control from the Toolbox to specify the target type |
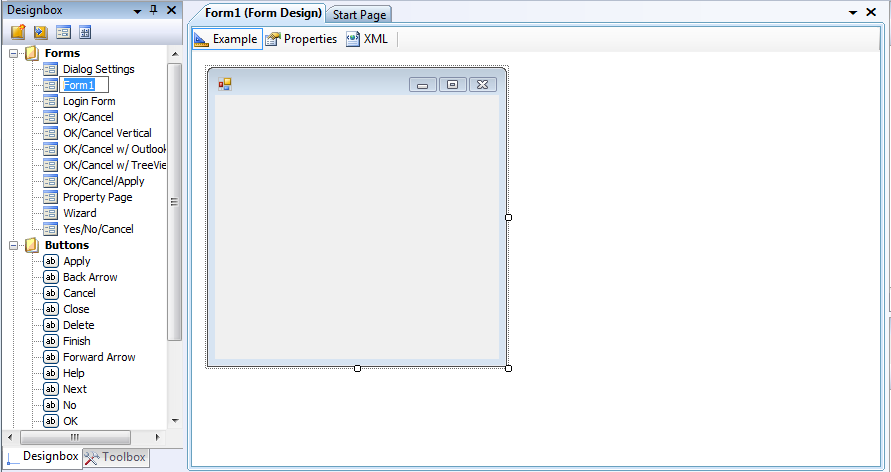
You can create a new Design for a Form by clicking on either the New Form Design toolbar button or the Add|New Form Design menu item on the Designbox Window right-click context menu. Designbox will create the new Design for you and open the Design for editing. You will then be able to begin editing the Form Design using the Properties Window and the Toolbox - just as if you were designing a Form in a project.
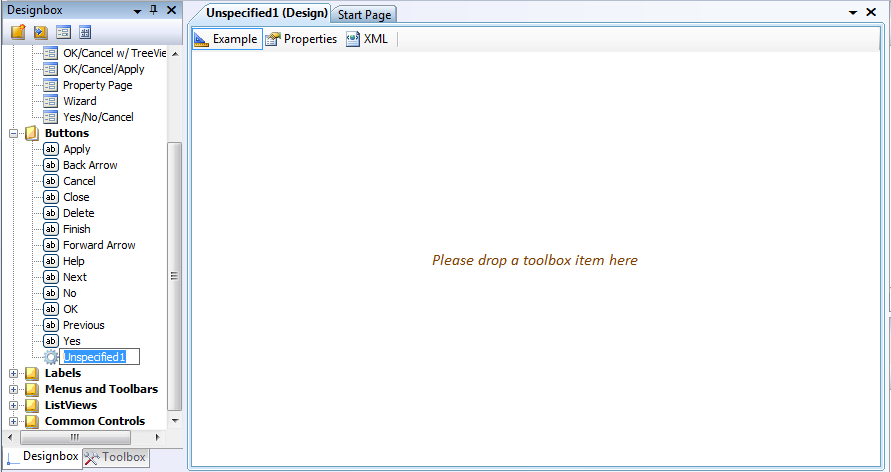
You can create a new Design for a control by clicking on either the New Control Design toolbar button or the Add|New Control Design menu item on the Designbox Window right-click context menu. Designbox will create the new Design for you and open the Design for editing. However, since you have not yet specified the design's Target Type, the Design's name will be prefixed with "Unspecified" and you will see a drop are in the Design Editor where you can drop a Toolbox Item from the Visual Studio Toolbox. By doing so, the design will target the exact same type as the control that belongs to the toolbox item. After you drop the control, the Design Editor will create an example control for you to start defining your design.
The Design Editor is the document window shown in the examples above that let you edit the definition of a Design. Each Design Editor you open will be contained within a Visual Studio Document that you can save or close just like any of the other code documents or designers that you work with. You open a Design Editor by either double-clicking on the Design node in the Designbox Window tree or by selecting the Design node and clicking on the Open menu item on the right-click context menu.
There are 3 separate tab pages in the Design Editor, each containing a different aspect of the Design you are editing:
| Example | The Example Page contains a sample control that exemplifies the design. By making changes to the control, you are actually redefining your design while constantly seeing what controls will look like when they have the design applied to them. |
| Properties | The Properties Page lets you set the
properties of the Design. Note that these properties belong to
the actual Design and are not properties that will be applied to
controls when the design is applied. You can also set the small, large and preview images that will be used to represent the design in the Designbox Window and the Design Gallery. |
| XML | This page lets you see the XML definition of the Design that will be stored in the Design Palette file. The XML data is updated as you change the example and redefine the Design but you cannot edit the XML directly. |